Virtual Kubelet provides an abstraction layer for the Kubelet and supports various provider. What does it mean ? It means that you can schedule workload on a node, as if it was a Kubernetes node but in reality, it uses a CaaS provider (container as a service: AWS Fargate, OpenStack Zun, etc) as a backend to schedule pods instead of a classic node.

We are going to deploy a Kubernetes cluster on AWS EKS and then use virtual Kubelet with AWS Fargate.
Prerequisites
kubectlterraformterragrunthelmaws-iam-authenticatorawscliwith proper account configured
EKS Cluster
To do so, let's use tEKS which supports EKS and Virtual Kubelet, I will explain later the plumbing behind.
In the project directory we can create a virtual-kubelet cluster:
cp -ar terraform/live/sample terraform/live/virtual-kubelet
We will need to change some variables in terraform/live/terraform.tfvars :
terragrunt = {
  remote_state {
    backend = "s3"
    config {
      bucket         = "sample-terraform-remote-state"
      key            = "${path_relative_to_include()}"
      region         = "eu-west-1"
      encrypt        = true
      dynamodb_table = "sample-terraform-remote-state"
    }
  }
}
You can modify the bucket and dynamodb table to suit your needs. Then in live/virtual-kubelet/eks/terraform.tfvars change the following :
cluster_name = virtual-kubelet

//
// [kiam]
//
kiam = {
  create_iam_resources = true
  attach_to_pool = 0
}

virtual_kubelet = {
  create_iam_resources_kiam = true
  create_cloudwatch_log_group = true
  cloudwatch_log_group = "eks-virtual-kubelet"
}
cni_metrics_helper = {
  create_iam_resources = false
  create_iam_resources_kiam = true
  use_kiam = true
  attach_to_pool = 0
  .....
}

node-pools = [
  {
    name = "controller"
    min_size = 1
    max_size = 1
    desired_capacity = 1
    instance_type = "t3.medium"
    key_name = "keypair" // replace with your keypair
    volume_size = 30
    volume_type = "gp2"
    autoscaling = "disabled"
    kubelet_extra_args = "--kubelet-extra-args '--node-labels node-role.kubernetes.io/controller=\"\" --register-with-taints node-role.kubernetes.io/controller=:NoSchedule --kube-reserved cpu=250m,memory=0.5Gi,ephemeral-storage=1Gi --system-reserved cpu=250m,memory=0.2Gi,ephemeral-storage=1Gi --eviction-hard memory.available<500Mi,nodefs.available<10%'"
  },
  {
    name = "default"
    min_size = 3
    max_size = 9
    desired_capacity = 3
    instance_type = "t3.medium"
    key_name = "keypair" // replace with your keypair
    volume_size = 30
    volume_type = "gp2"
    autoscaling = "enabled"
    kubelet_extra_args = "--kubelet-extra-args '--node-labels node-role.kubernetes.io/node=\"\" --kube-reserved cpu=250m,memory=0.5Gi,ephemeral-storage=1Gi --system-reserved cpu=250m,memory=0.2Gi,ephemeral-storage=1Gi --eviction-hard memory.available<500Mi,nodefs.available<10%'"
  },
You should be able to deploy the cluster:
terragrunt apply
export KUBECONFIG=$(pwd)/kubeconfig

kubectl get nodes

NAME                                        STATUS   ROLES        AGE    VERSION
ip-10-0-14-197.eu-west-1.compute.internal   Ready    node         109s   v1.12.7
ip-10-0-53-239.eu-west-1.compute.internal   Ready    node         112s   v1.12.7
ip-10-0-68-226.eu-west-1.compute.internal   Ready    controller   113s   v1.12.7
ip-10-0-74-84.eu-west-1.compute.internal    Ready    node         113s   v1.12.7
What happened under the hood ? here you get two node pools, one is called controller and the other one is the default with just basic nodes. The difference lies in the IAM permission allocated for each node pools. The controller node is able to host kiam which provides IAM permissions to pods. The node hosting kiam-server requires specific IAM permissions so a specific node pool is dedicated to mitigate security concerns.
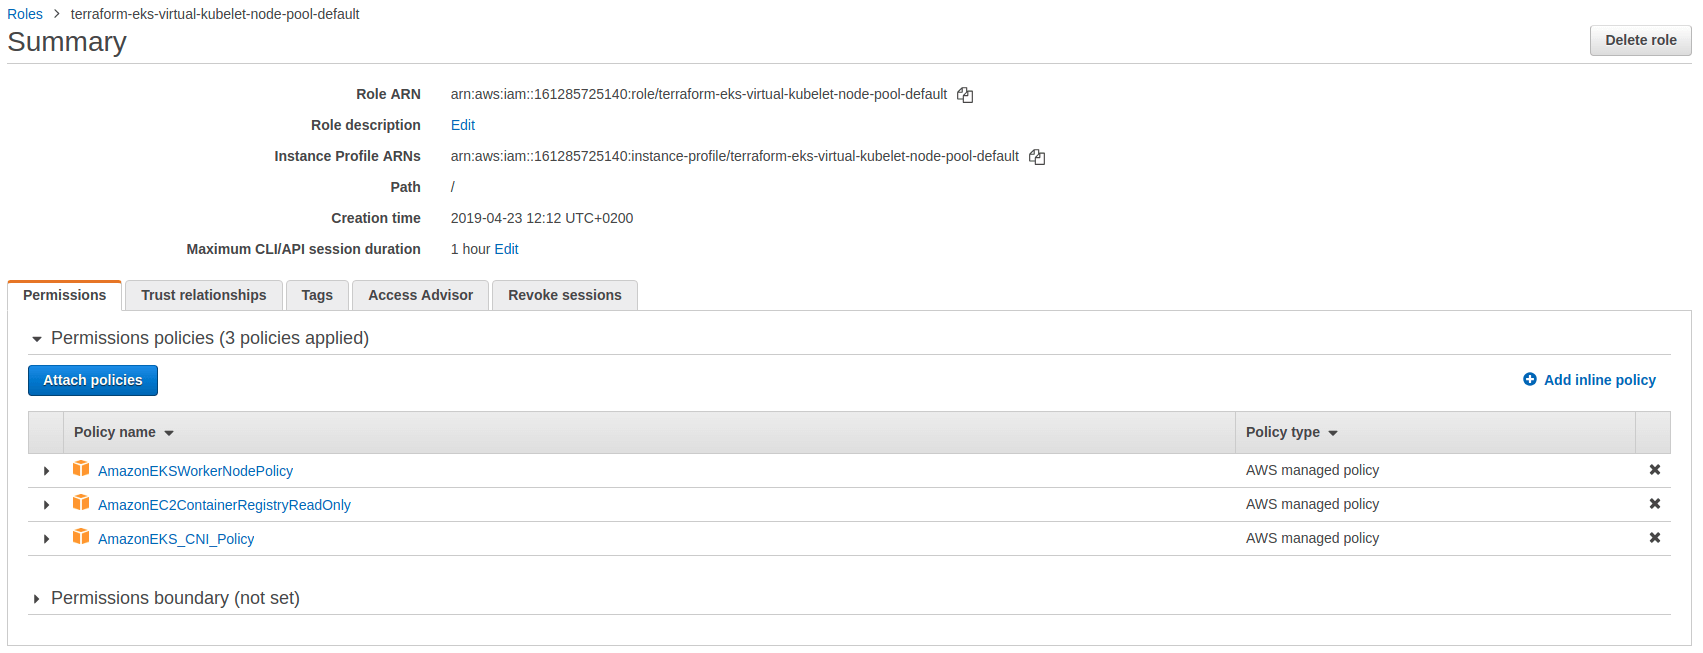
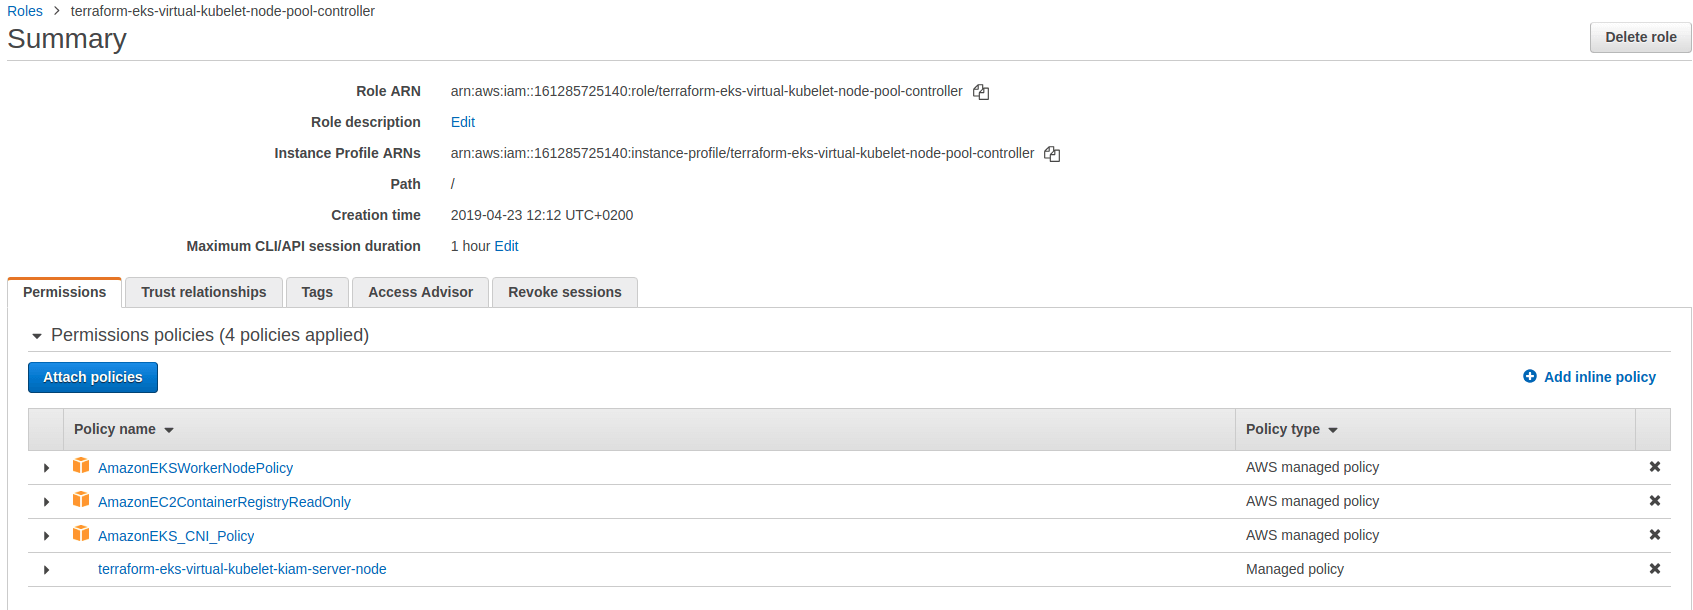
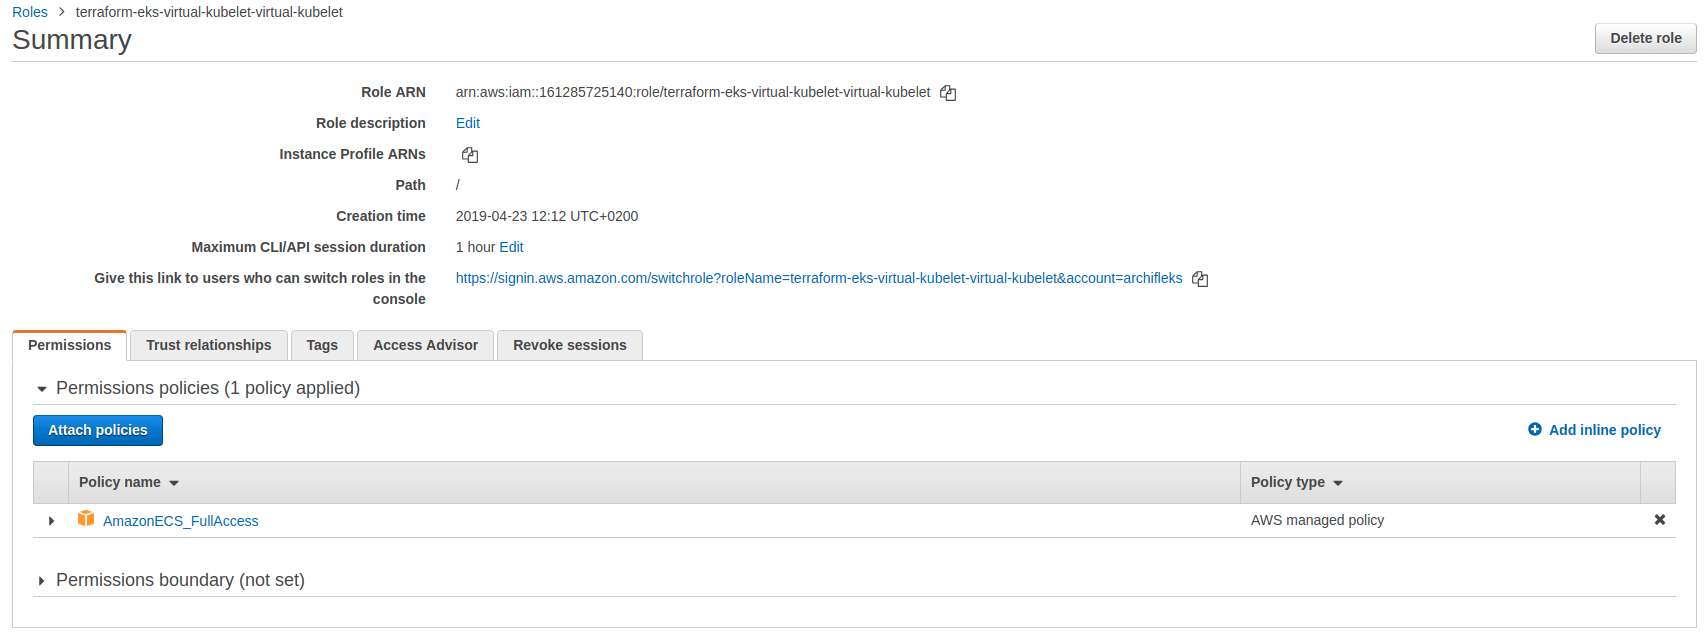
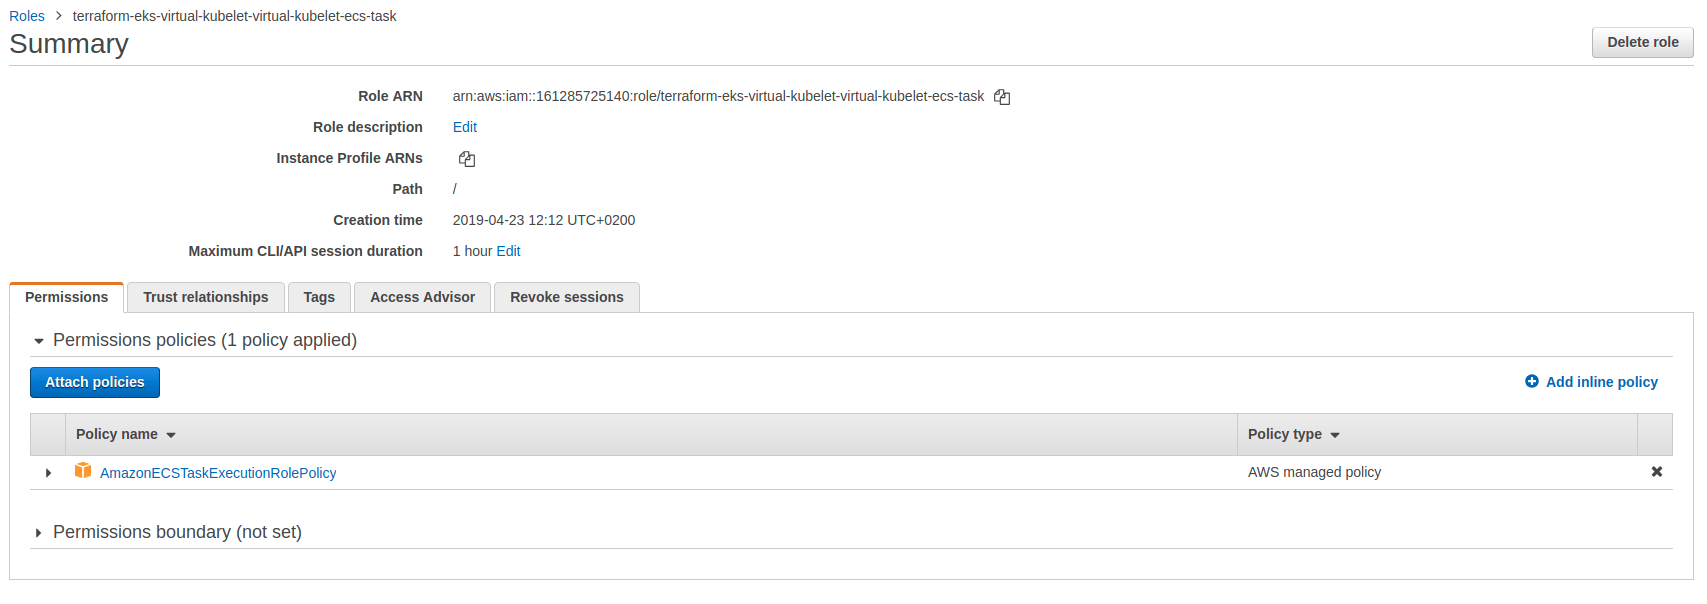
You can see the extra IAM policy on the controller. In addition, two roles are created for Kiam, one with ECS permission and another one for the ECS task execution roles.
Deploying Virtual Kubelet
Now we can focus on the Virtual kubelet. In the eks-addons/terraform.tfvars:
//
// [provider]
//
aws = {
  "region" = "eu-west-1"  //change region if necessary
}

eks = {
  "kubeconfig_path" = "./kubeconfig"
  "remote_state_bucket" = "sample-terraform-remote-state" //change bucket if necessary
  "remote_state_key" = "virtual-kubelet/eks" // change cluster name if necessary
}

//
// [kiam]
//
kiam = {
  version = "v3.2"
  chart_version = "2.2.2"
  enabled = true  // make sure kiam is enabled
  namespace = "kiam"
  server_use_host_network = "true"
  extra_values = ""
}

//
// [virtual-kubelet]
//
virtual_kubelet = {
  use_kiam = true
  version = "0.7.4"
  enabled = true // make sure virtual kubelet is enabled
  namespace = "virtual-kubelet"
  cpu = "20"  // number of vCPU exposed to Kubelet
  memory = "40Gi" // Memory exposed to Kubelet
  pods = "20" // Max pods
  operatingsystem = "Linux"
  platformversion = "LATEST"
  assignpublicipv4address = false
  fargate_cluster_name = "virtual-kubelet" // Fargate cluster name
}
In the previous file you can customize various aspect of the Virtual Kubelet such as CPU, RAM, etc.
Run terragrunt apply inside the eks-addons folder.
You should see a new node labeled agent:
kubectl get nodes

NAME                                        STATUS   ROLES        AGE     VERSION
ip-10-0-14-197.eu-west-1.compute.internal   Ready    node         3h42m   v1.12.7
ip-10-0-53-239.eu-west-1.compute.internal   Ready    node         3h42m   v1.12.7
ip-10-0-68-226.eu-west-1.compute.internal   Ready    controller   3h42m   v1.12.7
ip-10-0-74-84.eu-west-1.compute.internal    Ready    node         3h42m   v1.12.7
virtual-kubelet                             Ready    agent        3m52s   v1.13.1-vk-vtest-26-g686cdb8b-dev
If you describe the node you can see the hardware specs defined above:
Name:               virtual-kubelet
Roles:              agent
Labels:             alpha.service-controller.kubernetes.io/exclude-balancer=true
                    beta.kubernetes.io/os=linux
                    kubernetes.io/hostname=virtual-kubelet
                    kubernetes.io/role=agent
                    type=virtual-kubelet
Annotations:        node.alpha.kubernetes.io/ttl: 0
CreationTimestamp:  Tue, 23 Apr 2019 16:02:29 +0200
Taints:             virtual-kubelet.io/provider=aws:NoSchedule
Unschedulable:      false
Conditions:
  Type                 Status  LastHeartbeatTime                 LastTransitionTime                Reason                     Message
  ----                 ------  -----------------                 ------------------                ------                     -------
  Ready                True    Tue, 23 Apr 2019 16:07:55 +0200   Tue, 23 Apr 2019 16:02:29 +0200   Fargate cluster is ready   ok
  OutOfDisk            False   Tue, 23 Apr 2019 16:07:55 +0200   Tue, 23 Apr 2019 16:02:29 +0200   Fargate cluster is ready   ok
  MemoryPressure       False   Tue, 23 Apr 2019 16:07:55 +0200   Tue, 23 Apr 2019 16:02:29 +0200   Fargate cluster is ready   ok
  DiskPressure         False   Tue, 23 Apr 2019 16:07:55 +0200   Tue, 23 Apr 2019 16:02:29 +0200   Fargate cluster is ready   ok
  NetworkUnavailable   False   Tue, 23 Apr 2019 16:07:55 +0200   Tue, 23 Apr 2019 16:02:29 +0200   Fargate cluster is ready   ok
  KubeletConfigOk      True    Tue, 23 Apr 2019 16:07:55 +0200   Tue, 23 Apr 2019 16:02:29 +0200   Fargate cluster is ready   ok
Addresses:
  InternalIP:  10.0.68.61
Capacity:
 cpu:      20
 memory:   40Gi
 pods:     20
 storage:  40Gi
Allocatable:
 cpu:      20
 memory:   40Gi
 pods:     20
 storage:  40Gi
System Info:
 Machine ID:
 System UUID:
 Boot ID:
 Kernel Version:
 OS Image:
 Operating System:           Linux
 Architecture:               amd64
 Container Runtime Version:
 Kubelet Version:            v1.13.1-vk-vtest-26-g686cdb8b-dev
 Kube-Proxy Version:
Non-terminated Pods:         (0 in total)
  Namespace                  Name    CPU Requests  CPU Limits  Memory Requests  Memory Limits  AGE
  ---------                  ----    ------------  ----------  ---------------  -------------  ---
Allocated resources:
  (Total limits may be over 100 percent, i.e., overcommitted.)
  Resource           Requests  Limits
  --------           --------  ------
  cpu                0 (0%)    0 (0%)
  memory             0 (0%)    0 (0%)
  ephemeral-storage  0 (0%)    0 (0%)
  storage            0         0
Events:              <none>
What's happened under the hood ?
It's a bit tricky to make Virtual Kubelet works, the logic is integrated in the Terraform/Terragrunt modules but let's take a closer look.
In the first step when we deployed the cluster, we created some IAM roles to be assumed by the Virtual Kubelet, if you look at the Virtual Kubelet manifest you can see the role being reference and used by the pods and Kiam. The role allows the Virtual Kubelet to drive AWS Fargate.
kubectl -n virtual-kubelet get pods virtual-kubelet-9558b64d9-npxxd -o yaml

apiVersion: v1
kind: Pod
metadata:
  annotations:
    iam.amazonaws.com/role: arn:aws:iam::161285725140:role/terraform-eks-virtual-kubelet-virtual-kubelet  # The IAM role created when we deployed the cluster
spec:
  automountServiceAccountToken: false
  containers:
  - args:
    - --kubeconfig=/etc/kubeconfig
    - --provider=aws
    - --provider-config=/etc/fargate/fargate.toml
    env:
    - name: KUBELET_PORT
      value: "10250"
    - name: VKUBELET_POD_IP
      valueFrom:
        fieldRef:
          apiVersion: v1
          fieldPath: status.podIP
    image: microsoft/virtual-kubelet:0.9.0
    imagePullPolicy: IfNotPresent
    name: virtual-kubelet
    resources: {}
    terminationMessagePath: /dev/termination-log
    terminationMessagePolicy: File
    volumeMounts:
    - mountPath: /etc/kubeconfig
      name: kubeconfig
    - mountPath: /etc/fargate
      name: fargate-conf
    - mountPath: /etc/kubernetes
      name: etc-kubernetes
    - mountPath: /usr/bin/aws-iam-authenticator
      name: aws-iam-authenticator
.......
In addition there is a ConfigMap containing the configuration:
kubectl -n virtual-kubelet get configmap virtual-kubelet-fargate-conf -o yaml

apiVersion: v1
data:
  fargate.toml: |
    Region = "eu-west-1"
    ClusterName = "virtual-kubelet"
    Subnets = ["subnet-056eac9d4d6e9c420","subnet-02acb69ee4ad9f533","subnet-01ba17cfea4d1e8d2"]
    SecurityGroups = ["sg-08fc41db3db4f9e71"]
    AssignPublicIPv4Address = false
    ExecutionRoleArn = "arn:aws:iam::161285725140:role/terraform-eks-virtual-kubelet-virtual-kubelet-ecs-task"
    CloudWatchLogGroupName = "eks-cluster-virtual-kubelet-eks-virtual-kubelet"
    PlatformVersion = "LATEST"
    OperatingSystem = "Linux"
    CPU = "20"
    Memory = "40Gi"
    Pods = "20"
kind: ConfigMap
We must also give the Virtual Kubelet the proper permissions to register itself to the Kubernetes control plan, this would be done with RBAC but with EKS, it needs to be done with IAM and the aws-auth configmap which map IAM users/roles with Kubernetes groups. To do so we add the previously created IAM role in the aws-auth ConfigMap:
kubectl -n kube-system get cm aws-auth -o yaml
apiVersion: v1
data:
  mapRoles: |
    - rolearn: arn:aws:iam::161285725140:role/terraform-eks-virtual-kubelet-node-pool-controller
      username: system:node:{{EC2PrivateDNSName}}
      groups:
        - system:bootstrappers
        - system:nodes
    - rolearn: arn:aws:iam::161285725140:role/terraform-eks-virtual-kubelet-node-pool-default
      username: system:node:{{EC2PrivateDNSName}}
      groups:
        - system:bootstrappers
        - system:nodes
    - rolearn: arn:aws:iam::161285725140:role/terraform-eks-virtual-kubelet-virtual-kubelet
      username: virtual-kubelet
      groups:
        - system:masters
kind: ConfigMap
Let's see how it works
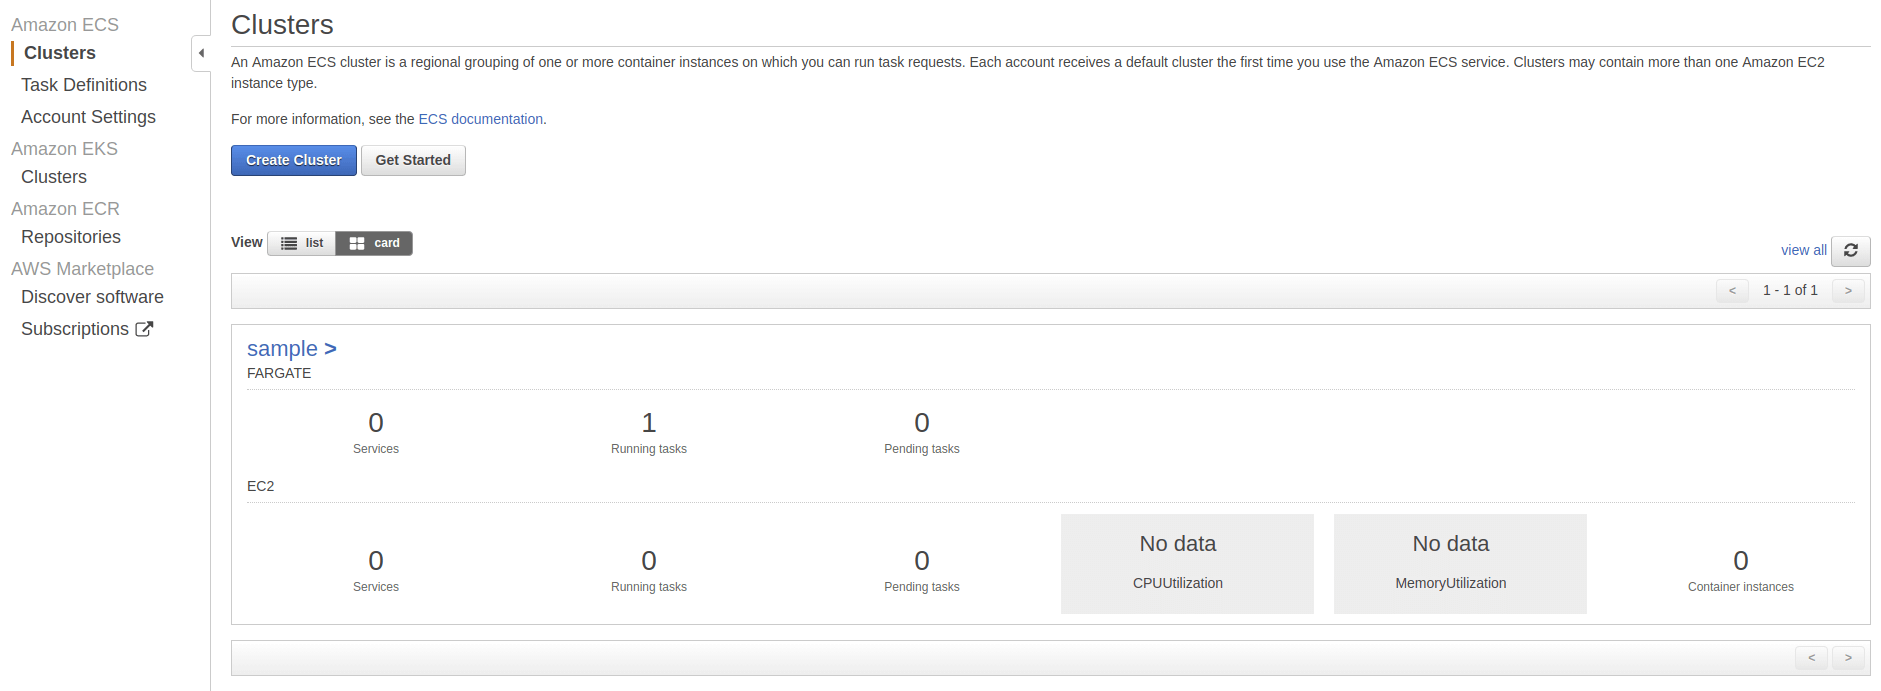
In the Fargate console, you can see a new cluster name sample:
Let's create an nginx deployment which will get scheduled on the virtual-kubelet node.
cat << EOT | kubectl apply -f -
apiVersion: apps/v1
kind: Deployment
metadata:
  labels:
    app: nginx
  name: nginx
  namespace: default
spec:
  replicas: 1
  selector:
    matchLabels:
      app: nginx
  strategy: {}
  template:
    metadata:
      labels:
        app: nginx
    spec:
      tolerations:
      - key: virtual-kubelet.io/provider
        operator: "Equal"
        value: aws
        effect: NoSchedule
      nodeSelector:
        kubernetes.io/role: agent
      containers:
      - image: nginx
        name: nginx
        resources: {}
---
apiVersion: v1
kind: Service
metadata:
  labels:
    app: nginx
  name: nginx
  namespace: default
spec:
  ports:
  - name: "80"
    port: 80
    protocol: TCP
    targetPort: 80
  selector:
    app: nginx
  type: LoadBalancer
The pods and service work as usual:
k get pods -o wide
NAME                     READY   STATUS    RESTARTS   AGE     IP           NODE              NOMINATED NODE   READINESS GATES
nginx-85c8c56bc4-hjr6j   1/1     Running   0          6m21s   10.0.65.92   virtual-kubelet   <none>           <none>

k get svc -o wide
NAME         TYPE           CLUSTER-IP     EXTERNAL-IP                                                              PORT(S)        AGE     SELECTOR
kubernetes   ClusterIP      172.20.0.1     <none>                                                                   443/TCP        51m     <none>
nginx        LoadBalancer   172.20.74.60   aa02a3004999311e9982302b2ea9a2bd-106116022.eu-west-1.elb.amazonaws.com   80:31339/TCP   3m32s   app=default
Our task is accessible behind an ELB, and then thanks to kube-proxy, we are forwarded to our task:

If we look at the task running in AWS Fargate:
 aws ecs list-tasks --cluster sample
{
    "taskArns": [
        "arn:aws:ecs:eu-west-1:161285725140:task/c07ca976-4895-41e6-b0f3-7703a207ca72"
    ]
}
Now we can try to scale our nginx pods:
kubectl scale deployment nginx --replicas=10
Let's look at our tasks again:
aws ecs list-tasks --cluster sample
{
    "taskArns": [
        "arn:aws:ecs:eu-west-1:161285725140:task/0ea81c0b-341b-4b8a-b0f2-686045f2088e",
        "arn:aws:ecs:eu-west-1:161285725140:task/13956421-4201-49db-b492-1d087b9cd481",
        "arn:aws:ecs:eu-west-1:161285725140:task/47076b52-4117-47cf-8cbe-034bc0022b19",
        "arn:aws:ecs:eu-west-1:161285725140:task/778d93a5-4d2f-4c47-b376-60a59af1b688",
        "arn:aws:ecs:eu-west-1:161285725140:task/c03d108d-e106-45f1-8d1c-7b7ac0ae2212",
        "arn:aws:ecs:eu-west-1:161285725140:task/c07ca976-4895-41e6-b0f3-7703a207ca72",
        "arn:aws:ecs:eu-west-1:161285725140:task/c27124b6-b3d4-4a86-aa2d-7bc509e5a821",
        "arn:aws:ecs:eu-west-1:161285725140:task/c5e56253-fb9d-4eeb-a19f-6879b37ec05c",
        "arn:aws:ecs:eu-west-1:161285725140:task/dd50e2c2-a5c5-47ef-90ba-474c1f0fee80",
        "arn:aws:ecs:eu-west-1:161285725140:task/fde5299e-dae0-4f99-ae17-d49318c19532"
    ]
}
Conclusion
This is still an early project, but it is getting more and more traction and support for multiple provider. This is the perfect way to lower infrastructure cost, for jobs or periodic tasks such as cronjob or when you need to burst rapidly without provisioning new instances.
Découvrez les derniers articles d'alter way


